Introduction toMark-Making
Mark-making in art is like the secret handshake of creativity. It’s the funky dance moves you bust out with your paintbrush, pencil, or whatever tool you’ve got handy, to leave your mark on the canvas.
Just like how every superhero has their signature move, every artist has their own unique style of mark-making, their artistic fingerprint, if you will.
So, let’s dive into the lively chaos of creativity, where even the wonkiest lines and the goofiest splatters can turn into masterpieces!
You may not need to erase anything but it’s good to have an eraser to hand just in case you change your mind about parts of your drawing. I like to get scribbly when drawing my initial outlines, which inevitably means erasing all my planning lines at some point as I neaten and refine my work.
![]()
You may not need to erase anything but it’s good to have an eraser to hand just in case you change your mind about parts of your drawing. I like to get scribbly when drawing my initial outlines, which inevitably means erasing all my planning lines at some point as I neaten and refine my work.
![]()
You will need something to draw on, so find yourself a sheet of cartridge paper, approximately 140gsm is perfect but so long as you’re not using printer paper you will be OK.
![]()
You’ll need a ruler to outline your boxes, but not for the cross-hatching. Measuring your shapes with a ruler can also be useful when trying to keep objects like vases looking symmetrical.
![]()
Detail, texture & tone…
Once you’ve drawn your outlines, your drawing might seem a bit cartoony because it’s looking much simpler than you want. Add dots, dashes, squiggles or cross-hatching and you can create details that make your drawing look much more realistic.
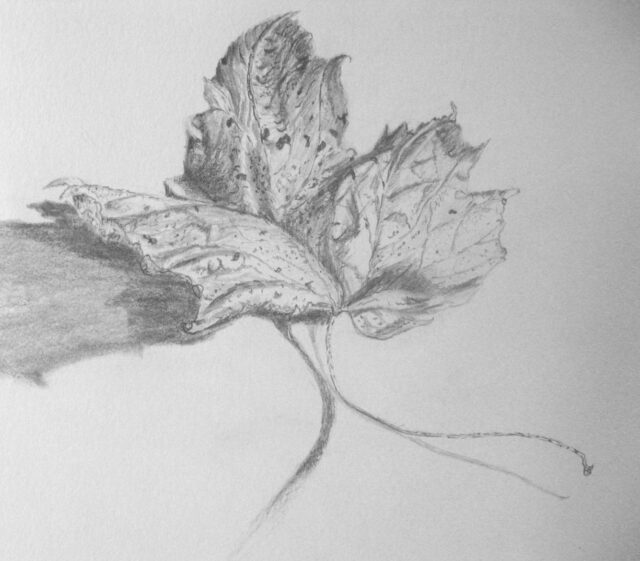
This is great for organic things, like leaves and bark, fish scales or animal fur. Look at the dots and blobby shapes on this leaf, for example:
If you’re drawing something textured and don’t want to have to draw every single detail you can see, create some marks that give the impression of texture. That’s what I did when I added cross-hatching to this drawing of a plant:

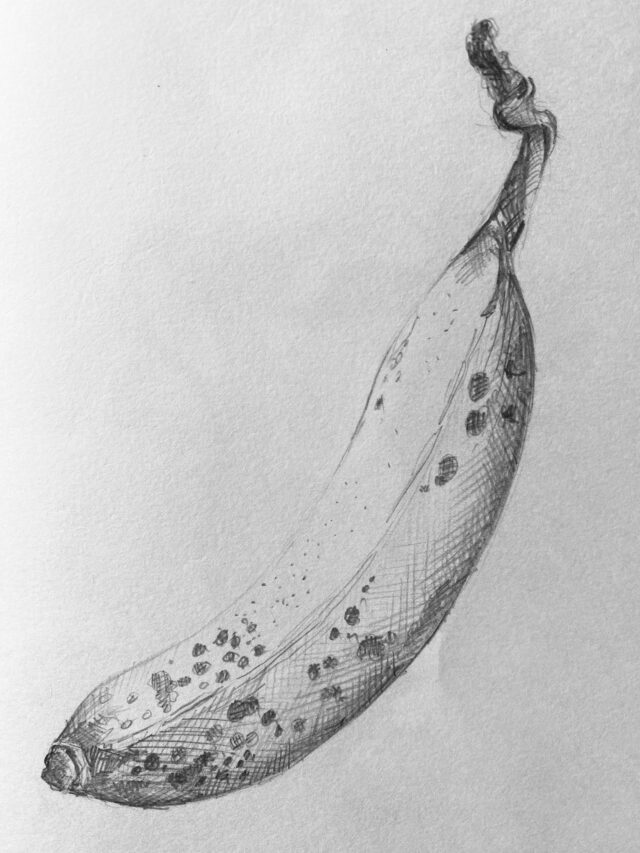
Tone is all about how light or dark something is in your drawing. By adding marks that are close together, you can create shadows. By adding fewer marks and spreading them out, you can create highlights. By spreading them out bit by bit, you can create gradients.
Can you see how the shadows, highlights and gradients make this banana look 3D?
Practice creating marks:
Get playful in this exercise by inventing as many different types of marks as you can. Then, think about when you could use each of them in your drawings.
The trick is to create abstract marks, rather than drawing pictures of things.
Mark-making Worksheet:
Examples by other students:
What do you think has gone well and how might they be improved?


Put your skills to the test


What do you feel like drawing today? Look for something textured so you can try out different marks for the different textures you see. Here are some examples:
• A crumbling leaf
• A gnarly twig
• A textured shell
• A rusty tool
• A crumbling rock or pebble
• A ripe banana
• A pineapple
Plan out your outlines as lightly as you can so that they don’t steal the show! Here are some tips for putting them in the right place:
-
- Draw a line of symmetry down the middle if it needs to be mirrored (the same on one side as the other).
- Measure the width and height of each shape with your finger or a ruler.
- Check the angles of each line or shape by holding your pencil up to it and comparing different parts of the object to the corresponding parts of your drawing.
Don’t aim for perfection! So long as it looks like the object in front of you, it doesn’t have to be exactly the same. Many artists deliberately make parts of their drawings bigger or smaller than they are in reality so that they control which parts of the image have the most emphasis.
Now you know how to create marks and you’ve drawn your outlines, all you need to do is add them to this drawing.
Remember, placing your marks close to each other will make the area look darker, forming shadows. Spreading them out will make the area lighter, forming highlights. See if you can spread them out gradually to create gradients, which help your drawings to look 3D.
So get making those marks and watch the textures add life to your drawing!
Top tips:
- Practise your marks on a scrap piece of paper if you’re not sure which mark-making technique to use.
- Avoid outlining your image. Let the marks stop at the edge of each shape without a line, unless you feel it really needs one.
- Avoid using a ruler! Hand-drawn marks are far more natureal and expressive.
- Create different values by placing marks closer together for the shadows and further apart for the highlights.
- Vary your marks. They say variety is the spice of life!
Examples of completed drawings:
Do you think the marks help to add texture to the drawings?
Do they help to make the banana look ripe?
Do they make the face look older?


